FTP Passive 모드를 활성화 필요. 1. vsftpd 설정 변경 /etc/vsftpd/vsftpd.conf 상에 아래 내용 추가 기입 #passive modpasv_enable=YES pasv_min_port=5001 pasv_max_port=5001 $ systemctl restart vsftpd 2. 위에서 추가한 해당 포트(e.g. 5001 번), firewall 예외 처리 $ firewall-cmd --zone=public --add-port=5001/tcp --permanent $ firewall-cmd --reload 3. FTP 패시브 모드를 위한 모듈 로딩 명령 추가 (/etc/rc.d/rc.local) vi /etc/rc.d/rc.local modprobe ip_conntrack_ftp 라인 추가!! [Note]. root 계정 접속은 기본설정으로 허용되지 않으며, 필요시 아래와 같이 조치.vi /etc/vsftpd/user_list vi /etc/vsftpd/ftpusersroot 값 주석처리원문: http://museonlab.blogspot.kr/2015/07/tip-vsftpd-ftp.html
2017년 5월 25일 목요일
vsftpd FTP 서버 접속은 성공하였으나, "디렉토리 목록 조회 실패" 현상 발생시
2017년 4월 13일 목요일
How To Protect SSH With Fail2Ban on CentOS 7
https://www.digitalocean.com/community/tutorials/how-to-protect-ssh-with-fail2ban-on-centos-7
2017년 2월 23일 목요일
centos7 버전 커널버전 체크
OS버전
[user@localhost etc]$ cat /etc/centos-release
CentOS Linux release 7.3.1611 (Core)
커널버전
[user@localhost etc]$ uname -r
3.10.0-514.el7.x86_64
[user@localhost etc]$ cat /etc/centos-release
CentOS Linux release 7.3.1611 (Core)
커널버전
[user@localhost etc]$ uname -r
3.10.0-514.el7.x86_64
2017년 2월 21일 화요일
https://www.digitalocean.com/community/tutorials/how-to-install-apache-tomcat-8-on-centos-7
How To Install Apache Tomcat 8 on CentOS 7
Introduction
Apache Tomcat is a web server and servlet container that is used to serve Java applications. Tomcat is an open source implementation of the Java Servlet and JavaServer Pages technologies, released by the Apache Software Foundation. This tutorial covers the basic installation and some configuration of the latest release of Tomcat 8 on your CentOS 7 server.
Prerequisites
Before you begin with this guide, you should have a separate, non-root user account set up on your server. You can learn how to do this by completing steps 1-3 in the initial server setup for CentOS 7. We will be using the
demo user created here for the rest of this tutorial.Install Java
Tomcat requires that Java is installed on the server, so any Java web application code can be executed. Let's satisfy that requirement by installing OpenJDK 7 with yum.
To install OpenJDK 7 JDK using yum, run this command:
- sudo yum install java-1.7.0-openjdk-devel
Answer
y at the prompt to continue installing OpenJDK 7.
Note that a shortcut to the JAVA_HOME directory, which we will need to configure Tomcat later, can be found at
/usr/lib/jvm/jre.
Now that Java is installed, let's create a
tomcat user, which will be used to run the Tomcat service.Create Tomcat User
For security purposes, Tomcat should be run as an unprivileged user (i.e. not root). We will create a new user and group that will run the Tomcat service.
First, create a new
tomcat group:
- sudo groupadd tomcat
Then create a new
tomcat user. We'll make this user a member of the tomcat group, with a home directory of /opt/tomcat (where we will install Tomcat), and with a shell of /bin/false (so nobody can log into the account):
- sudo useradd -M -s /bin/nologin -g tomcat -d /opt/tomcat tomcat
Now that our
tomcat user is set up, let's download and install Tomcat.Install Tomcat
The easiest way to install Tomcat 8 at this time is to download the latest binary release then configure it manually.
Download Tomcat Binary
Find the latest version of Tomcat 8 at the Tomcat 8 Downloads page. At the time of writing, the latest version is 8.5.9. Under the Binary Distributions section, then under the Core list, copy the link to the "tar.gz".
Let's download the latest binary distribution to our home directory.
First, change to your home directory:
- cd ~
Then use
wget and paste in the link to download the Tomcat 8 archive, like this (your mirror link will probably differ from the example):
- wget http://apache.mirrors.ionfish.org/tomcat/tomcat-8/v8.5.9/bin/apache-tomcat-8.5.9.tar.gz
We're going to install Tomcat to the
/opt/tomcat directory. Create the directory, then extract the the archive to it with these commands:
- sudo mkdir /opt/tomcat
- sudo tar xvf apache-tomcat-8*tar.gz -C /opt/tomcat --strip-components=1
Now we're ready to set up the proper user permissions.
Update Permissions
The
tomcat user that we set up needs to have the proper access to the Tomcat installation. We'll set that up now.
Change to the Tomcat installation path:
- cd /opt/tomcat
Give the
tomcat group ownership over the entire installation directory:
- sudo chgrp -R tomcat /opt/tomcat
Next, give the
tomcat group read access to the conf directory and all of its contents, and execute access to the directory itself:
- sudo chmod -R g+r conf
- sudo chmod g+x conf
Then make the
tomcat user the owner of the webapps, work, temp, and logs directories:
- sudo chown -R tomcat webapps/ work/ temp/ logs/
Now that the proper permissions are set up, let's set up a Systemd unit file.
Install Systemd Unit File
Because we want to be able to run Tomcat as a service, we will set up a Tomcat Systemd unit file .
Create and open the unit file by running this command:
- sudo vi /etc/systemd/system/tomcat.service
Paste in the following script. You may also want to modify the memory allocation settings that are specified in
CATALINA_OPTS:
/etc/systemd/system/tomcat.service
# Systemd unit file for tomcat
[Unit]
Description=Apache Tomcat Web Application Container
After=syslog.target network.target

[Service]
Type=forking

Environment=JAVA_HOME=/usr/lib/jvm/jre
Environment=CATALINA_PID=/opt/tomcat/temp/tomcat.pid
Environment=CATALINA_HOME=/opt/tomcat
Environment=CATALINA_BASE=/opt/tomcat
Environment='CATALINA_OPTS=-Xms512M -Xmx1024M -server -XX:+UseParallelGC'
Environment='JAVA_OPTS=-Djava.awt.headless=true -Djava.security.egd=file:/dev/./urandom'

ExecStart=/opt/tomcat/bin/startup.sh
ExecStop=/bin/kill -15 $MAINPID

User=tomcat
Group=tomcat
UMask=0007
RestartSec=10
Restart=always

[Install]
WantedBy=multi-user.target
Save and exit. This script tells the server to run the Tomcat service as the
tomcat user, with the settings specified.
Now reload Systemd to load the Tomcat unit file:
- sudo systemctl daemon-reload
Now you can start the Tomcat service with this
systemctl command:
- sudo systemctl start tomcat
Check that the service successfully started by typing:
- sudo systemctl status tomcat
If you want to enable the Tomcat service, so it starts on server boot, run this command:
- sudo systemctl enable tomcat
Tomcat is not completely set up yet, but you can access the default splash page by going to your domain or IP address followed by
:8080 in a web browser:
Open in web browser:
http://server_IP_address:8080
You will see the default Tomcat splash page, in addition to other information. Now we will go deeper into the installation of Tomcat.
Configure Tomcat Web Management Interface
In order to use the manager webapp that comes with Tomcat, we must add a login to our Tomcat server. We will do this by editing the
tomcat-users.xml file:
- sudo vi /opt/tomcat/conf/tomcat-users.xml
This file is filled with comments which describe how to configure the file. You may want to delete all the comments between the following two lines, or you may leave them if you want to reference the examples:
tomcat-users.xml excerpt
<tomcat-users>
...
</tomcat-users>
You will want to add a user who can access the
manager-gui and admin-gui (webapps that come with Tomcat). You can do so by defining a user similar to the example below. Be sure to change the username and password to something secure:
tomcat-users.xml — Admin User
<tomcat-users>
    <user username="admin" password="password" roles="manager-gui,admin-gui"/>
</tomcat-users>
Save and quit the tomcat-users.xml file.
By default, newer versions of Tomcat restrict access to the Manager and Host Manager apps to connections coming from the server itself. Since we are installing on a remote machine, you will probably want to remove or alter this restriction. To change the IP address restrictions on these, open the appropriate
context.xml files.
For the Manager app, type:
- sudo vi /opt/tomcat/webapps/manager/META-INF/context.xml
For the Host Manager app, type:
- sudo vi /opt/tomcat/webapps/host-manager/META-INF/context.xml
Inside, comment out the IP address restriction to allow connections from anywhere. Alternatively, if you would like to allow access only to connections coming from your own IP address, you can add your public IP address to the list:
context.xml files for Tomcat webapps
<Context antiResourceLocking="false" privileged="true" >
  <!--<Valve className="org.apache.catalina.valves.RemoteAddrValve"
         allow="127\.\d+\.\d+\.\d+|::1|0:0:0:0:0:0:0:1" />-->
</Context>
Save and close the files when you are finished.
To put our changes into effect, restart the Tomcat service:
- sudo systemctl restart tomcat
Access the Web Interface
Now that Tomcat is up and running, let's access the web management interface in a web browser. You can do this by accessing the public IP address of the server, on port 8080:
Open in web browser:
http://server_IP_address:8080
You will see something like the following image:
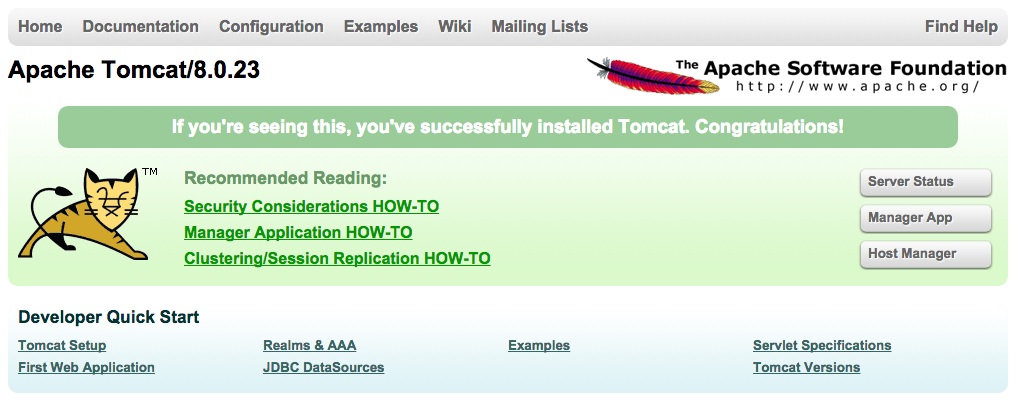
As you can see, there are links to the admin webapps that we configured an admin user for.
Let's take a look at the Manager App, accessible via the link or
http://server_IP_address:8080/manager/html: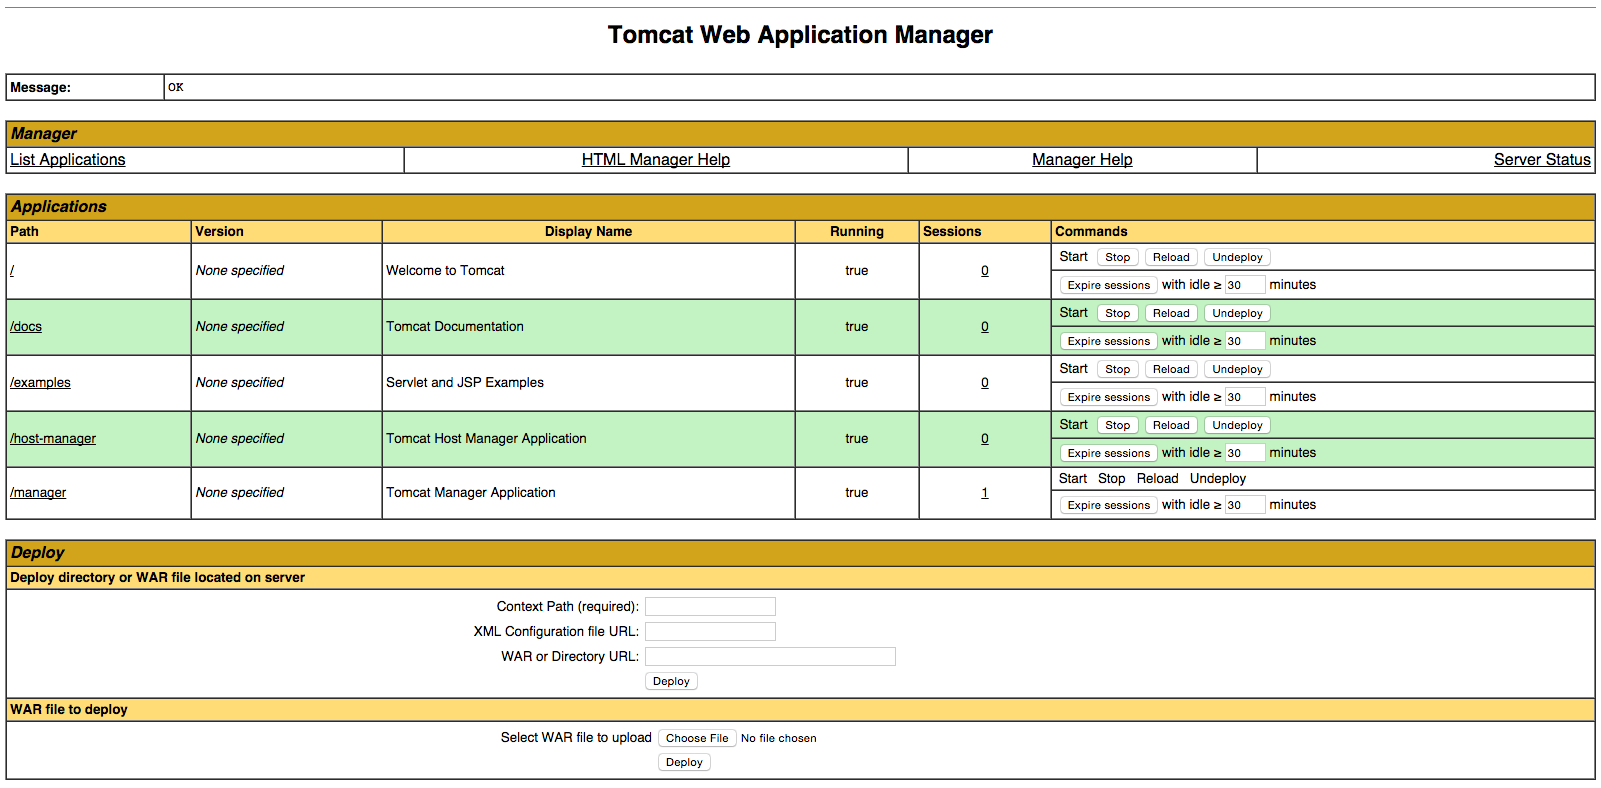
The Web Application Manager is used to manage your Java applications. You can Start, Stop, Reload, Deploy, and Undeploy here. You can also run some diagnostics on your apps (i.e. find memory leaks). Lastly, information about your server is available at the very bottom of this page.
Now let's take a look at the Host Manager, accessible via the link or
http://server_IP_address:8080/host-manager/html/: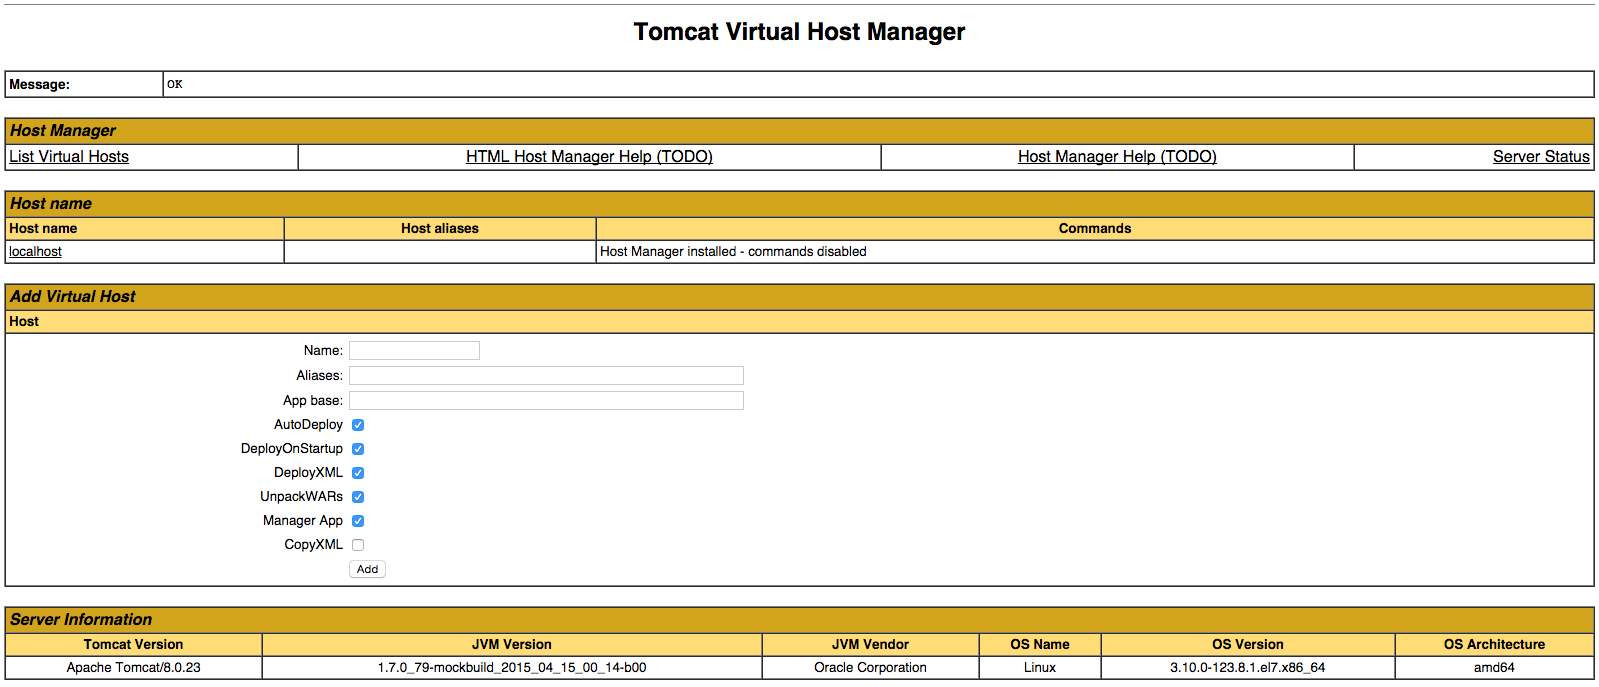
From the Virtual Host Manager page, you can add virtual hosts to serve your applications from.
Conclusion
Your installation of Tomcat is complete! Your are now free to deploy your own Java web applications!
Centos 7 version 체크
$ java -version
openjdk version "1.8.0_121"
OpenJDK Runtime Environment (build 1.8.0_121-b13)
OpenJDK 64-Bit Server VM (build 25.121-b13, mixed mode)
[pol@localhost /]$ java -showversion Test
openjdk version "1.8.0_121"
OpenJDK Runtime Environment (build 1.8.0_121-b13)
OpenJDK 64-Bit Server VM (build 25.121-b13, mixed mode)
openjdk version "1.8.0_121"
OpenJDK Runtime Environment (build 1.8.0_121-b13)
OpenJDK 64-Bit Server VM (build 25.121-b13, mixed mode)
[pol@localhost /]$ java -showversion Test
openjdk version "1.8.0_121"
OpenJDK Runtime Environment (build 1.8.0_121-b13)
OpenJDK 64-Bit Server VM (build 25.121-b13, mixed mode)
2016년 11월 18일 금요일
Install Pygame for Windows
Download pygame
http://www.lfd.uci.edu/~gohlke/pythonlibs/#pygame
Step 2: Install Pygame for Windows
pygame-1.9.2b1-cp35-cp35m-win32.whl
C:\Users\name\> cd Downloads
C:\Users\name\Downloads> pip install pygame-1.9.2b1-cp35-cp35m-win32.whl
원본 http://kidscancode.org/blog/2015/09/pygame_install/
2016년 11월 9일 수요일
MFRC522-python
Dump RFID Tag data using mxgxw/MFRC522-python
pi@raspberrypi ~ $ mkdir mxgxwpi@raspberrypi ~ $ cd mxgxw
pi@raspberrypi ~/ mxgxw $ git clone https://github.com/mxgxw/MFRC522-python
pi@raspberrypi ~/ mxgxw $ cd MFRC522-python
pi@raspberrypi ~/ mxgxw/MFRC522-python $ sudo python Read.py <-- then read rfrc522
pi@raspberrypi ~/ mxgxw/MFRC522-python $ sudo python Dump.py <-- read & dump
Pins
You can use this image for reference.
| Name | Pin # | Pin name |
|---|---|---|
| SDA | 24 | GPIO8 |
| SCK | 23 | GPIO11 |
| MOSI | 19 | GPIO10 |
| MISO | 21 | GPIO9 |
| IRQ | None | None |
| GND | Any | Any Ground |
| RST | 22 | GPIO25 |
| 3.3V | 1 | 3V3 |
Enable SPI using Raspberry Pi Configuration
pi@raspberrypi ~ $ ls /dev/spidev0.*ls:cannot access bla~
pi@raspberrypi ~ $ ls /etc/modprobe.d/raspi-blacklist.conf


Install python-dev and SPI-Py
pi@raspberrypi ~ $ sudo apt-get install python-dev
pi@raspberrypi ~ $ git clone https://github.com/lthiery/SPI-Py
pi@raspberrypi ~ $ cd SPI-Py
pi@raspberrypi ~ /SPI-Py $ sudo python setup.py install
download MFRC522-python
pi@raspberrypi ~ $ git clone https://github.com/rasplay/MFRC522-python.gitpi@raspberrypi ~ $ cd MFRC522-python
pi@raspberrypi ~ /MFRC522-python $
Enable device tree
pi@raspberrypi ~ $ ls /boot/config.txtpi@raspberrypi ~ $ sudo nano /boot/config.txt
device_tree=on <--append
Install latest version of bcm2835
The version of the package that this documentation refers to can be downloaded from http://www.airspayce.com/mikem/bcm2835/bcm2835-1.50.tar.gz--http://www.airspayce.com/mikem/bcm2835/
pi@raspberrypi ~ $ mv ~/Downloads/bcm2835-1.50.tar.gz ~
pi@raspberrypi ~ $ tar zxvf bcm2835-1.50.tar.gz
pi@raspberrypi ~ $ cd bcm2835-1.50
pi@raspberrypi ~ bcm2835-1.50 $
pi@raspberrypi ~ bcm2835-1.50 $ ./configure
pi@raspberrypi ~ bcm2835-1.50 $ make
pi@raspberrypi ~ bcm2835-1.50 $ sudo make check
pi@raspberrypi ~ bcm2835-1.50 $ sudo make installpi@raspberrypi ~ bcm2835-1.50 $ sudo reboot
read RFID tags using RFID Reader, RFID-RC522.
pi@raspberrypi ~ $ cd MFRC522-python
pi@raspberrypi ~ /MFRC522-python $ sudo python read.py
Dump RFID Tag data one-by-one
pi@raspberrypi ~ $ cd /mxgxw/MFRC522-python
pi@raspberrypi ~ /mxgxw/MFRC522-python $ sudo python pyDump1.py
출처 https://www.youtube.com/channel/UCUC46OBgd9H1gmQIpNp4_uw
2016년 11월 5일 토요일
python namedtuple - array
파이썬 배열을 이렇게도 사용합니다.....
namedtuple 을 사용하면 class보다 간편하게 사용가능합니다.
TUPLE 말뜻대로 배열에 이름표를 붙여서 사용하는데
c의 structure 같다는 느낌입니다.
http://stackoverflow.com/questions/11118486/python-list-as-variable-name

namedtuple 을 사용하면 class보다 간편하게 사용가능합니다.
TUPLE 말뜻대로 배열에 이름표를 붙여서 사용하는데
c의 structure 같다는 느낌입니다.
from collections import namedtuple class Fruit(object): def __init__(self, name, colour, shape): self.name = name self.colour = colour self.shape = shape variables1 = {} variables2 = {} Fruitlist = [ ['Apple', 'red', 'circle'], ['Banana', 'yellow', 'abnormal'], ['Pear', 'green', 'abnormal'] ] Fruits = namedtuple("Fruit",["name", "colour", "shape"]) Fruitlist.append(["감","노랑","동그라미"]) for args in Fruitlist: fruit1 = Fruit(*args) fruit2 = Fruits(*args) variables1[fruit1.name] = fruit1 variables2[fruit2.name] = fruit2 print("Apple shape: " + variables1["감"].shape) print("Apple shape: " + variables2["감"].shape)
http://stackoverflow.com/questions/11118486/python-list-as-variable-name
2016년 10월 27일 목요일
python 3.5 mysql connect on windows
- Download driver (PyMySQL-0.7.9.tar.gz (md5)) from here
- Extract and copy the folder pymysql into the python Lib folder e.g (C:\Users\MyUsername\AppData\Local\Programs\Python\Python35-32\Lib)
- Copy and run the following example.py
출처 http://stackoverflow.com/questions/35684400/how-to-use-python-3-5-1-with-a-mysql-dtabase#!/usr/bin/env python import pymysql conn = pymysql.connect(host='localhost', port=3306, user='root', passwd='', db='sandbox') cur = conn.cursor() cur.execute("SELECT * FROM users") print(cur.description) print() for row in cur: print(row) cur.close() conn.close()

2016년 10월 13일 목요일
Raspberry Pi에서 Python3.5로 MySQL에 연결
Raspberry Pi에서 Python3.5로 MySQL에 연결하려고 하면
sudo python3 -m pip install pymysql

파이썬 프로그램에서는 다음과 같이
Python 2.7에서는 다음과 같이...
sudo apt-get install python-mysqldb


sudo python3 -m pip install pymysql

파이썬 프로그램에서는 다음과 같이
import pymysql

conn = pymysql.connect(host='localhost', port=3306, user='userID', passwd='password', db='db')

cur = conn.cursor()
cur.execute("SELECT * FROM tableName")

print(cur.description)
print()

for row in cur:    print(row)

cur.close()
conn.close()
Python 2.7에서는 다음과 같이...
sudo apt-get install python-mysqldb

2016년 10월 6일 목요일
ImportError: cannot import name 'ImageTk'
from PIL import Image, ImageTk
>>> from PIL import Image, ImageTk
ImportError: cannot import name 'ImageTk'
$ sudo aptitude install python3-pil.imagetk
$ python3 -c "from PIL import ImageTk"
E: Unable to locate package python3-pil
E: Unable to locate package python3-imaging-tk>>> from PIL import Image, ImageTk
ImportError: cannot import name 'ImageTk'
$ sudo aptitude install python3-pil.imagetk
$ python3 -c "from PIL import ImageTk"
피드 구독하기:
글 (Atom)